配置教程
编辑网络配置文件
[ol]
[/ol]
/etc/sysctl.conf
[ol]
[/ol]
net.ipv6.conf.all.autoconf = 0
net.ipv6.conf.all.accept_ra = 0
net.ipv6.conf.eth0.autoconf = 0
net.ipv6.conf.eth0.accept_ra = 0
注释禁用 IPv6 的配置(如果存在)
部分操作系统(例如 Debian 12 )需要注释掉以下内容
net.ipv6.conf.all.disable_ipv6 = 1
net.ipv6.conf.default.disable_ipv6 = 1
net.ipv6.conf.lo.disable_ipv6 = 1
修改为
# net.ipv6.conf.all.disable_ipv6 = 1
# net.ipv6.conf.default.disable_ipv6 = 1
# net.ipv6.conf.lo.disable_ipv6 = 1
[ol]
[/ol]
sysctl -p
重启网络服务
执行以下命令重启网络
systemctl restart networking
如果执行后出现报错,请查看解决方法
重启服务器
如果没有异常,重启服务器
reboot
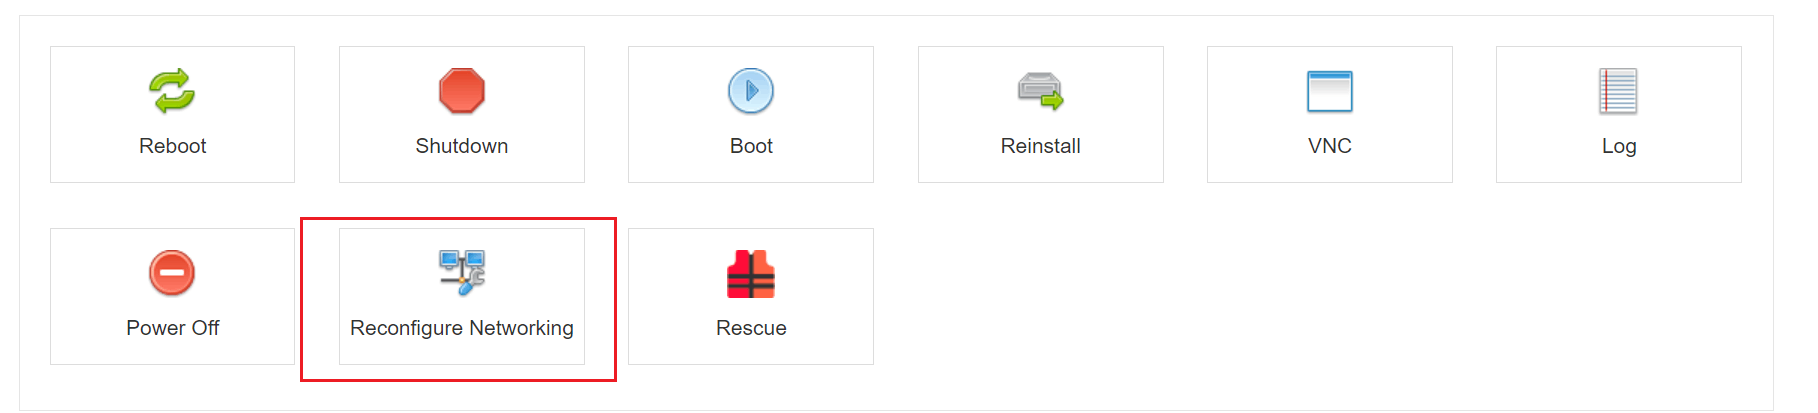
在控制面板中重置网络
[ol]
登陆 VM 面板
点击重置网络选项
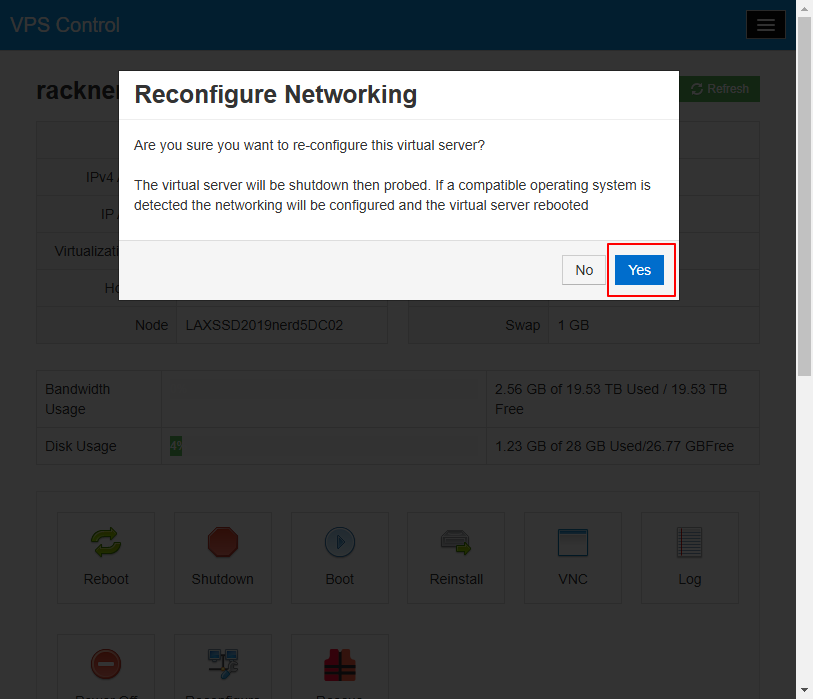
点击 Yes 按纽,稍等片刻
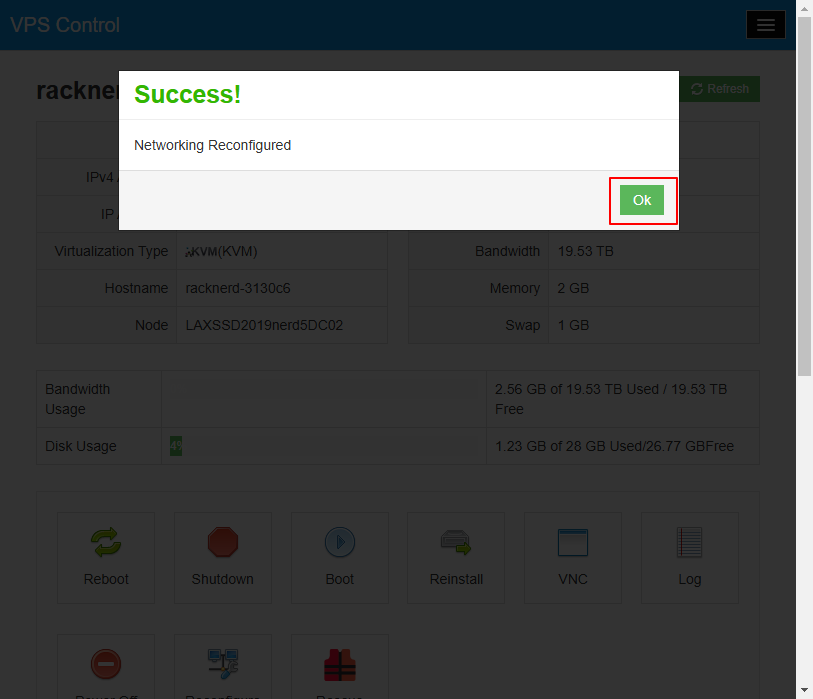
弹出该页面后,点击 Ok 按纽即可
[/ol]
测试 IPv6 是否正常
执行以下命令
curl ip.me -6
如果返回 IPv6 地址,则配置成功