安装VMware 以及 Ubuntu18.4镜像
https://blog.csdn.net/weixin_43290551/article/details/125954709
解决无法复制粘贴
https://blog.csdn.net/qq_41940277/article/details/122610916
vscode安装
https://vscode.cdn.azure.cn/stable/5e805b79fcb6ba4c2d23712967df89a089da575b/code_1.76.1-1678294265_amd64.deb
sudo dpkg -i 文件
这一条命令就够了sudo snap install code
dpkg: 错误: 另外一个进程已经为 dpkg frontend 加锁
sudo rm /var/lib/dpkg/lock-frontend
sudo rm /var/lib/dpkg/lock
二、安装好编译环境
1、安装依赖包(可以在官网找到)
sudo apt update
sudo apt-get install git-core gnupg flex bison build-essential zip curl zlib1g-dev gcc-multilib g++-multilib libc6-dev-i386 lib32ncurses5-dev x11proto-core-dev libx11-dev lib32z1-dev libgl1-mesa-dev libxml2-utils xsltproc unzip fontconfig
sudo apt htop jnettop 使用時要加sudo
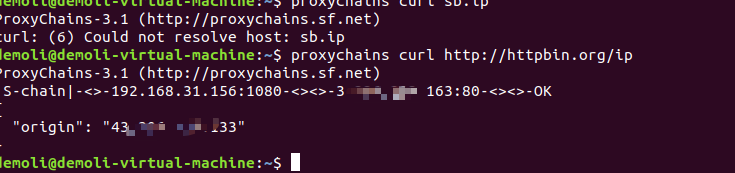
sudo apt install proxychains
sudo nano /etc/proxychains.conf 配置科學
proxychains curl http://httpbin.org/ip
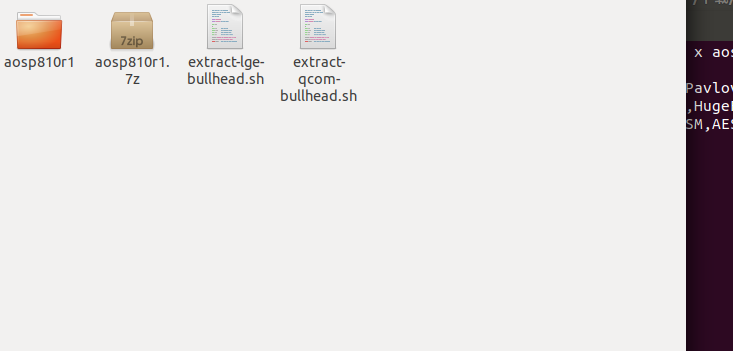
2、解压包和驱动
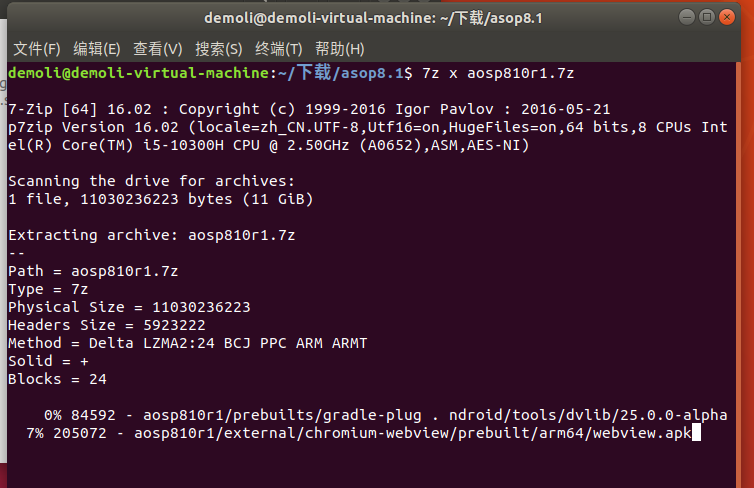
到20%的时候会暂停一下
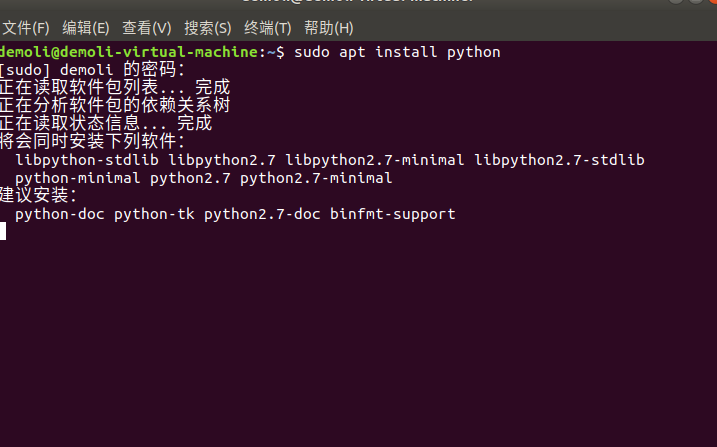
3、安装python2.7
4、安裝驅動
按enter然後空格
給vendor權限 记得这个文件夹下面所有文件都要给权限
sudo chmod 777 -R vendor/
三、修改源码
去除所有本地化的设置,让命令能正确执行
在安卓源码根目录下找到/build/envsetup.sh文件,在文件的最后加入下面的代码
export LC_ALL=C
将java环境添加到环境变量
安卓8.1.0源码默认带了jdk
路径在/prebuilts/jdk/jdk8,我选择将/prebuilts/jdk/jdk8/linux-x86/bin添加到了环境变量.
先打开.bashrc文件,在文件的最后加上export PATH=$PATH:/home/lingzhiyi/Documents/aosp-all/aosp-pixel810/aosp810r1/prebuilts/jdk/jdk8/linux-x86/bin
四、编译
回到安卓根目录
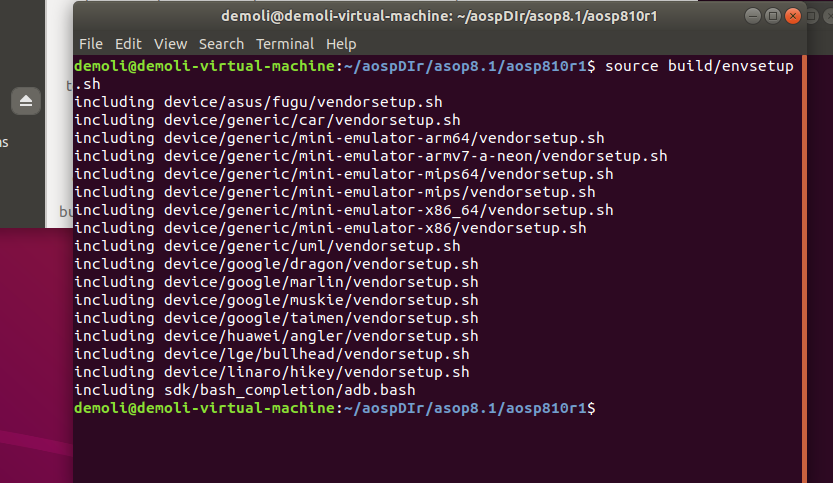
source build/envsetup.sh
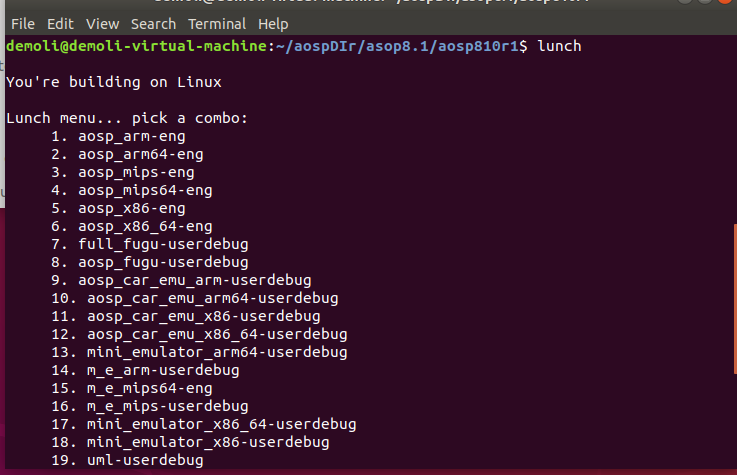
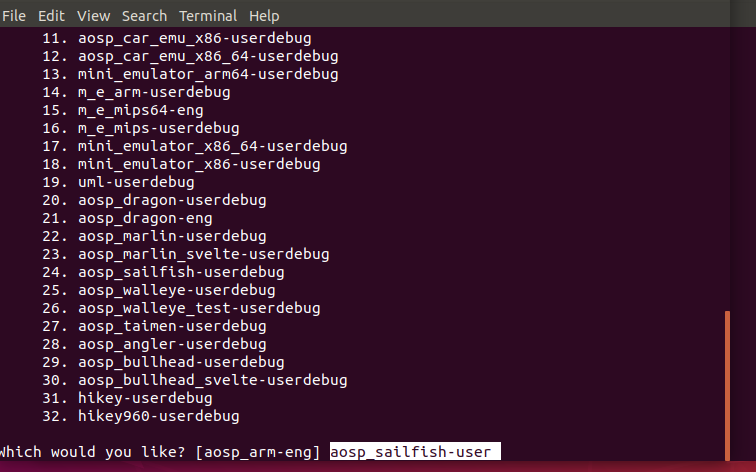
lunch 24 // lunch aosp_saifish-user
make -j6 // 6表示6个线程
到源码目录source build/envsetup.sh
lunch
aosp_sailfish-user

五、内置功能
1、内置frida的动态库
加载内置库
app = data.info.makeApplication(data.restrictedBackupMode, null);
// demoli-add start
String curPkgName = data.appInfo.packageName;
String path_for_gadget = "/sdcard/" + curPkgName+"demoligadgethook";
File path_curPkgName = new File(path_for_gadget);
if(path_curPkgName.exists()){
String arch = System.getProperty("os.arch");
try{
if (arch != null && arch.contains("64")){
System.load("/system/lib64/demoli.so");
}else{
System.load("/system/lib/demoli.so");
}
Slog.e("demoli", "load gadget successful");
}
catch (Exception e) {
Slog.e("demoli", "demoli_failed=" + e.toString());
}
}
// demoli-add end
// demoli-add start
//String curPkgName = app.getPackageName();
String path_for_dex = "/sdcard/"+curPkgName+"demolidexhook.dex";
File file = new File(path_for_dex);
if(file.exists()){
try {
//获取到 BaseDexClassLoader 的 pathList字段
// private final DexPathList pathList;
// find("BaseDexClassLoader","")
Field pathListField = BaseDexClassLoader.class.getDeclaredField("pathList");
//破坏封装,设置为可以调用
pathListField.setAccessible(true);
//拿到当前ClassLoader的pathList对象
Object pathListObj = pathListField.get(app.getClassLoader());
//获取当前ClassLoader的pathList对象的字节码文件(DexPathList )
Class dexPathListClass = pathListObj.getClass();
//拿到DexPathList 的 dexElements字段
// private final Element[] dexElements;
Field dexElementsField = dexPathListClass.getDeclaredField("dexElements");
//破坏封装,设置为可以调用
dexElementsField.setAccessible(true);
//使用插件创建 ClassLoader
DexClassLoader pathClassLoader = new DexClassLoader(file.getPath(), file.getAbsolutePath(), null, app.getClassLoader());
//拿到插件的DexClassLoader 的 pathList对象
Object newPathListObj = pathListField.get(pathClassLoader);
//拿到插件的pathList对象的 dexElements变量
Object newDexElementsObj = dexElementsField.get(newPathListObj);
//拿到当前的pathList对象的 dexElements变量
Object dexElementsObj=dexElementsField.get(pathListObj);
int oldLength = Array.getLength(dexElementsObj);
int newLength = Array.getLength(newDexElementsObj);
//创建一个dexElements对象
Object concatDexElementsObject = Array.newInstance(dexElementsObj.getClass().getComponentType(), oldLength + newLength);
//先添加新的dex添加到dexElement
for (int i = 0; i dexPathListClass2 = pathListObj2.getClass();
//拿到DexPathList 的 dexElements字段
// private final Element[] dexElements;
Field dexElementsField2 = dexPathListClass2.getDeclaredField("dexElements");
//破坏封装,设置为可以调用
dexElementsField2.setAccessible(true);
//使用插件创建 ClassLoader
DexClassLoader pathClassLoader2 = new DexClassLoader(file_apk.getPath(), file_apk.getAbsolutePath(), null, app.getClassLoader());
//拿到插件的DexClassLoader 的 pathList对象
Object newpathListObj2 = pathListField2.get(pathClassLoader2);
//拿到插件的pathList对象的 dexElements变量
Object newDexElementsObj2 = dexElementsField2.get(newpathListObj2);
//将插件的 dexElements对象设置给 当前ClassLoader的pathList对象
dexElementsField2.set(pathListObj2, newDexElementsObj2);
Slog.e("dexhook","demoli add apk successful!");
} catch (Exception e) {
e.printStackTrace();
}
}else{
Slog.e("apkhook",path_for_apk+" not exists");
}
// demoli add end
六、通用改机方案
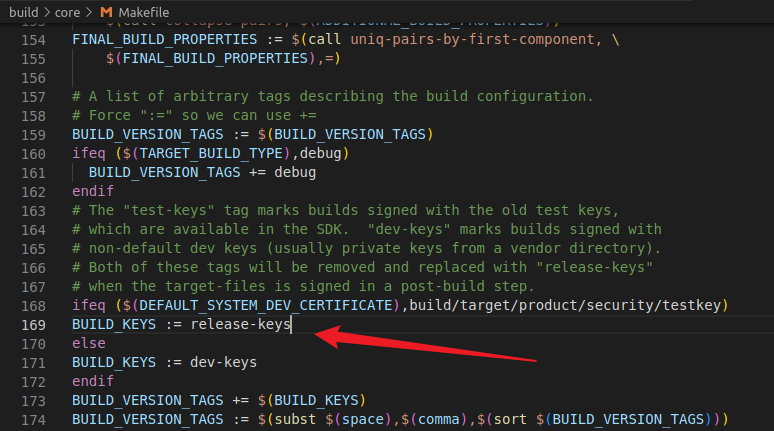
然后需要把修改后的mybuild.prop加入到编译链中。安卓8是如下的方案,但是安卓10的修改路径不一样。需要放置在最后

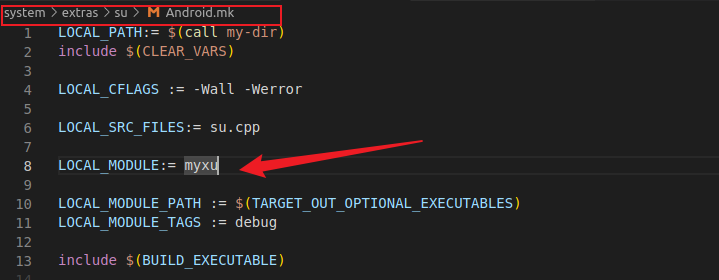
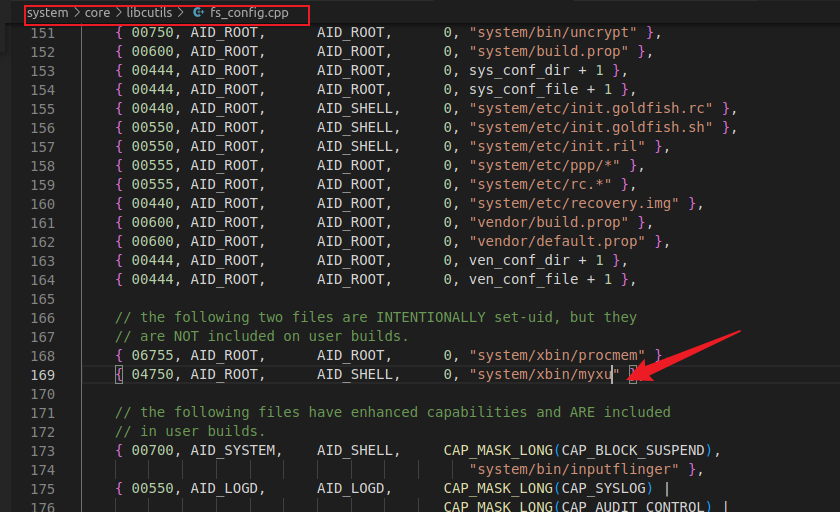
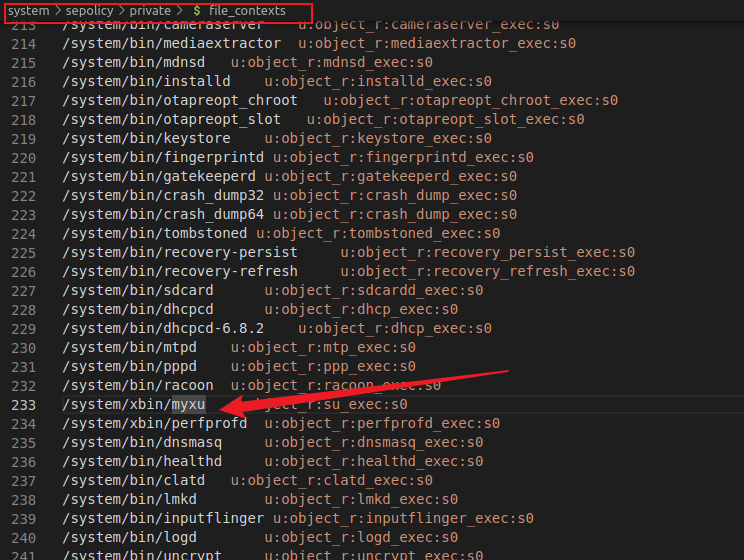
1、自定义su
电脑太垃圾了 等我编译出来在发个效果