声明
本文章中所有内容仅供学习交流使用,不用于其他任何目的,不提供完整代码,抓包内容、敏感网址、数据接口等均已做脱敏处理,严禁用于商业用途和非法用途,否则由此产生的一切后果均与作者无关!
本文章未经许可禁止转载,禁止任何修改后二次传播,擅自使用本文讲解的技术而导致的任何意外,作者均不负责,若有侵权,请联系作者立即删除!
逆向目标
抓包分析
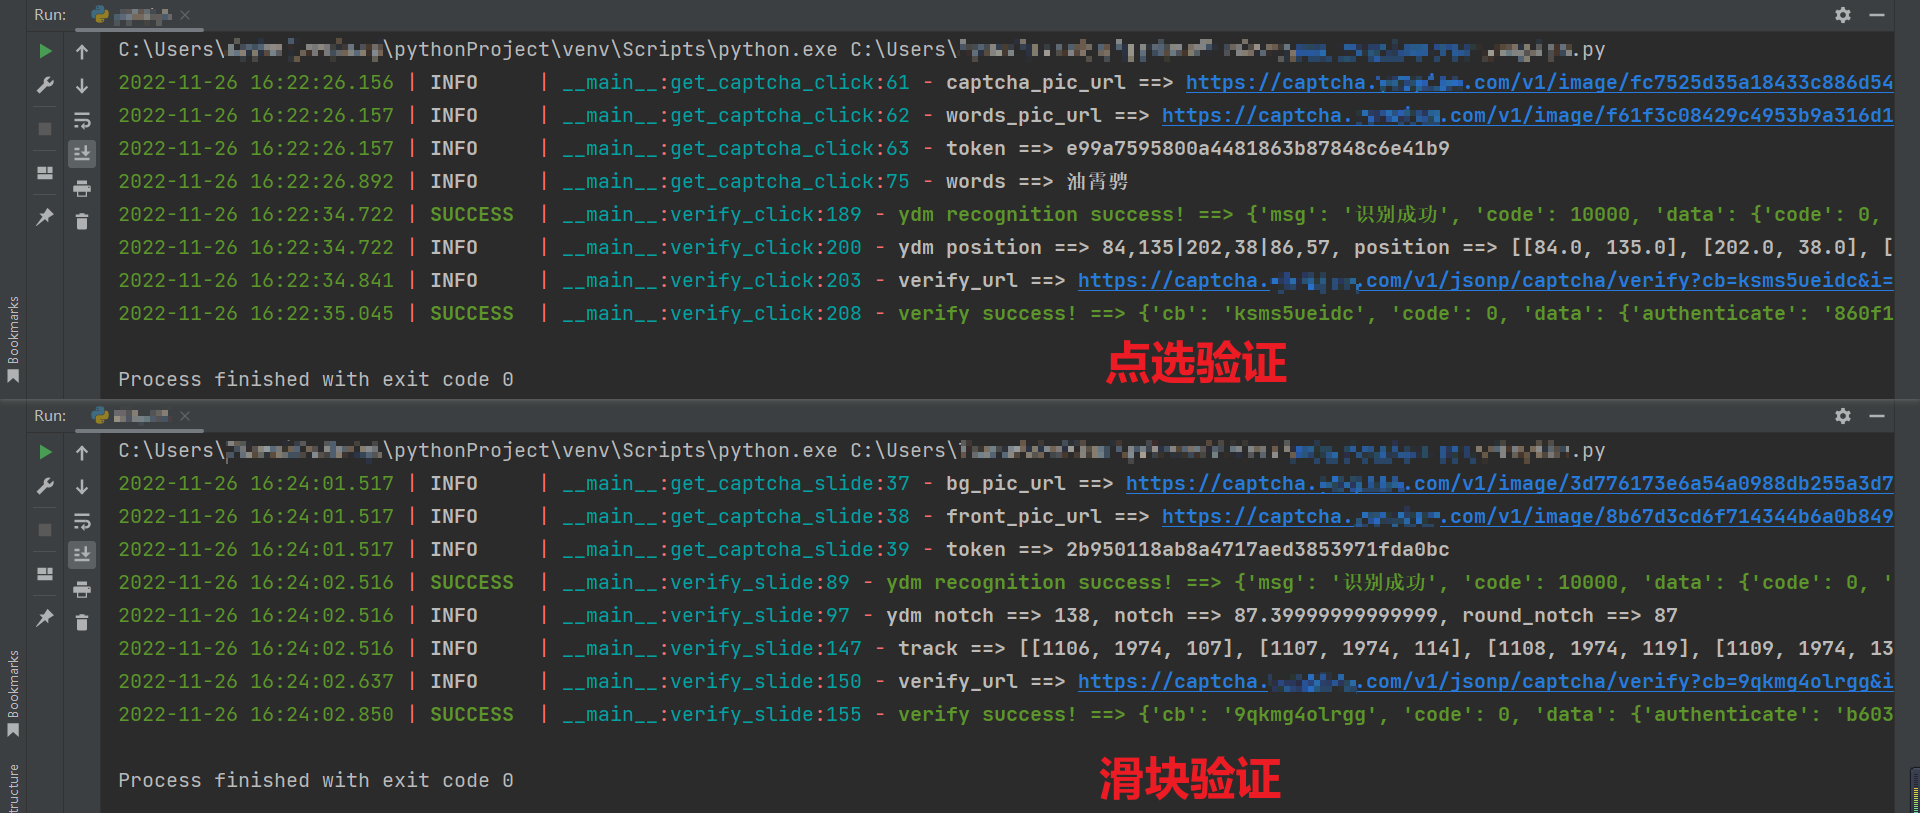
验证码图片获取接口,GET 请求,包含四个参数:cb、i、k、captchaId,有时候可能也会有 token 参数,那是因为不是第一次加载图片,比如刷新图片,会将之前接口的 token 值带上。
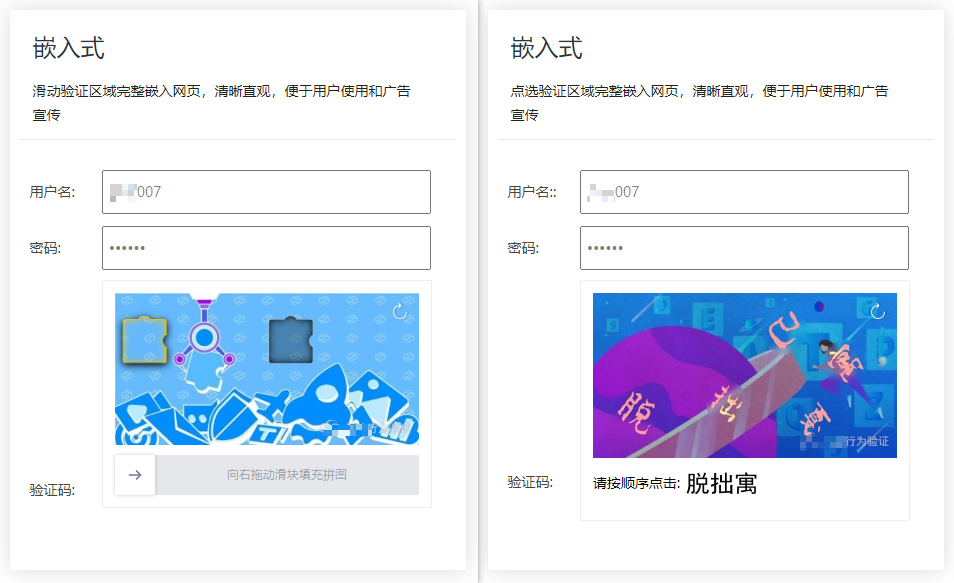
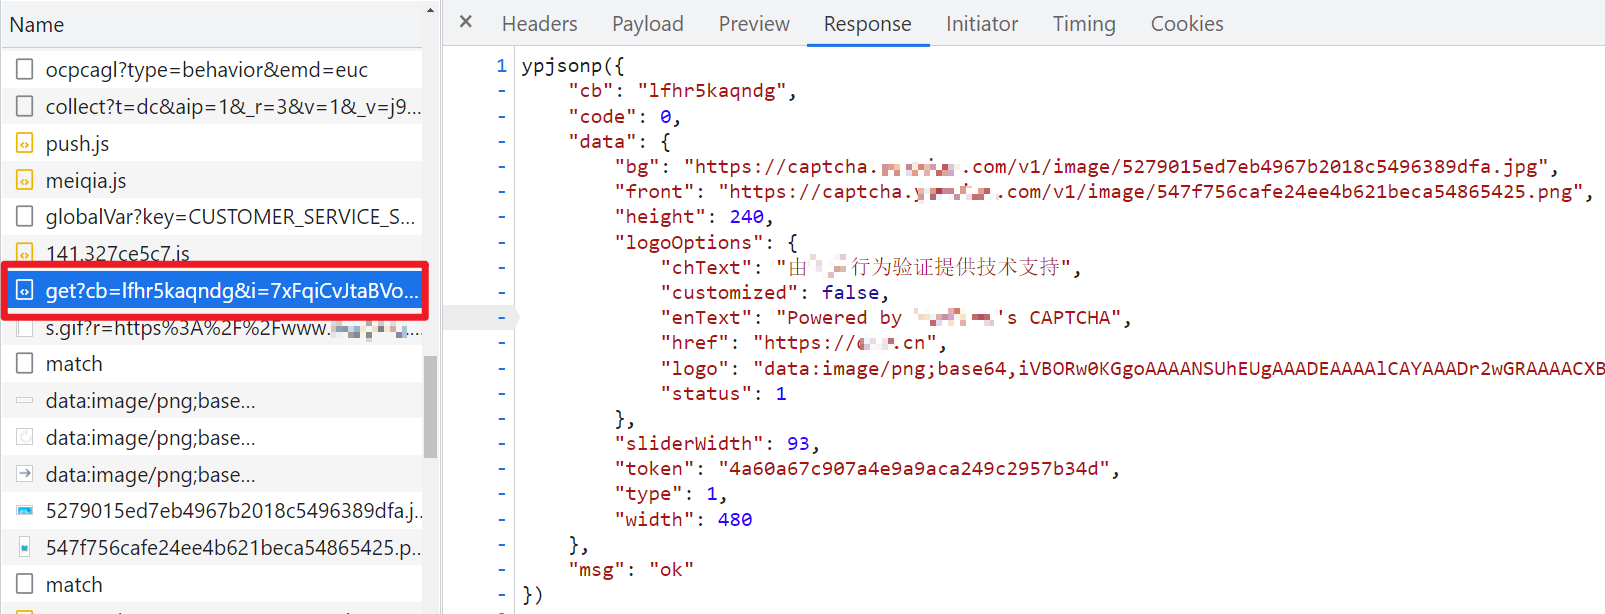
接口返回,如果是滑动验证码,则 bg 是背景图,front 是滑块图,还有个 token 值后续会用到。
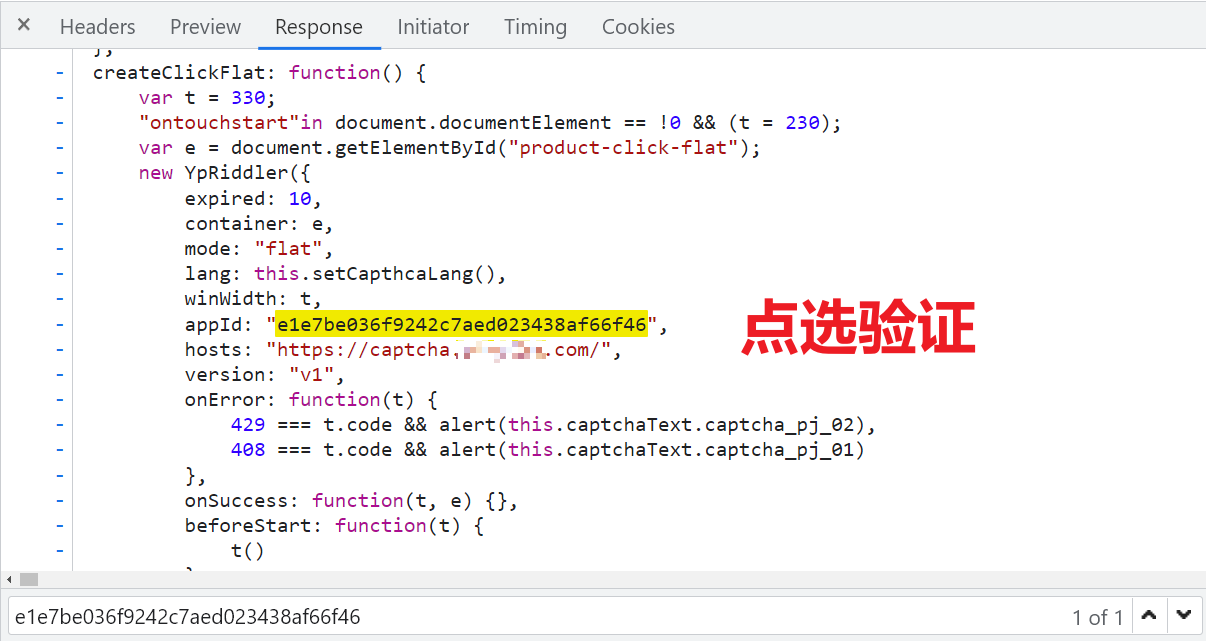
如果是点选验证码,则 captchaImage 是底图,wordsImage 是需要点击的文字,同样的有个 token 值后续会用到。
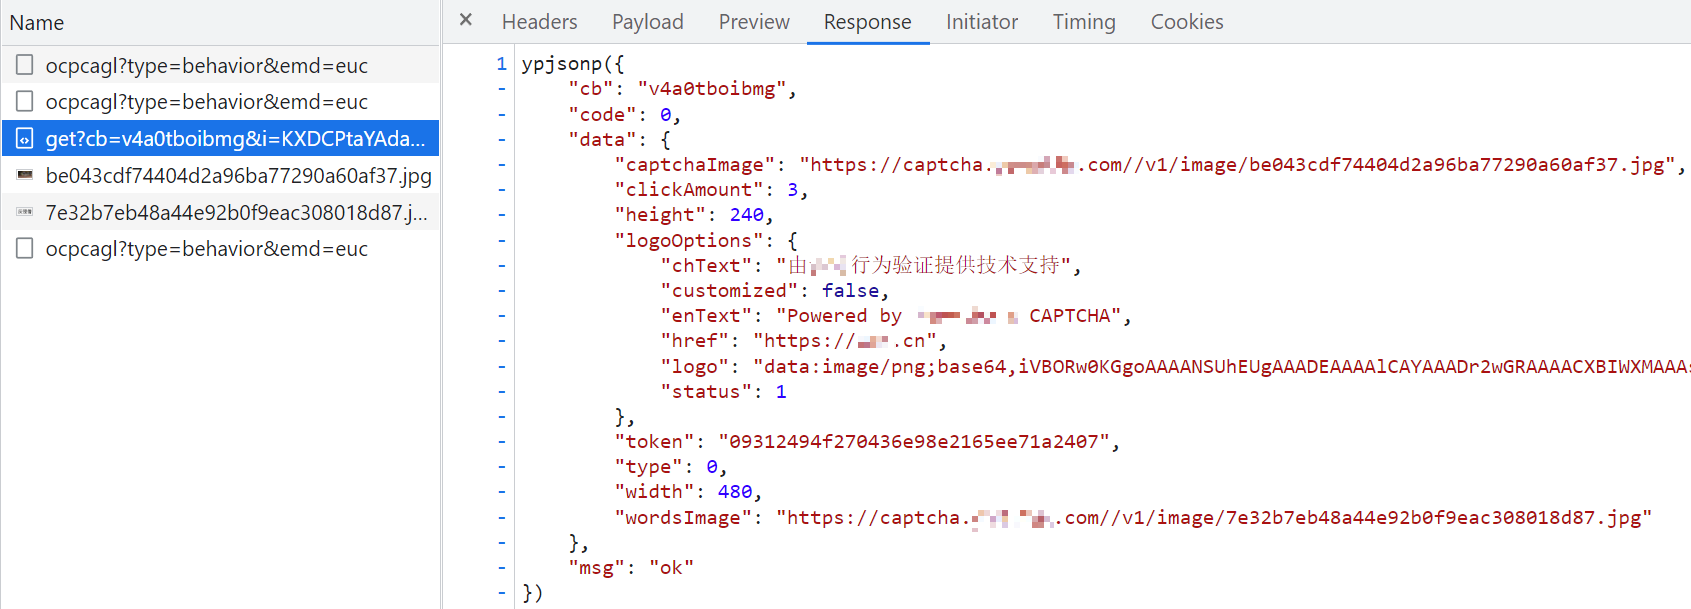
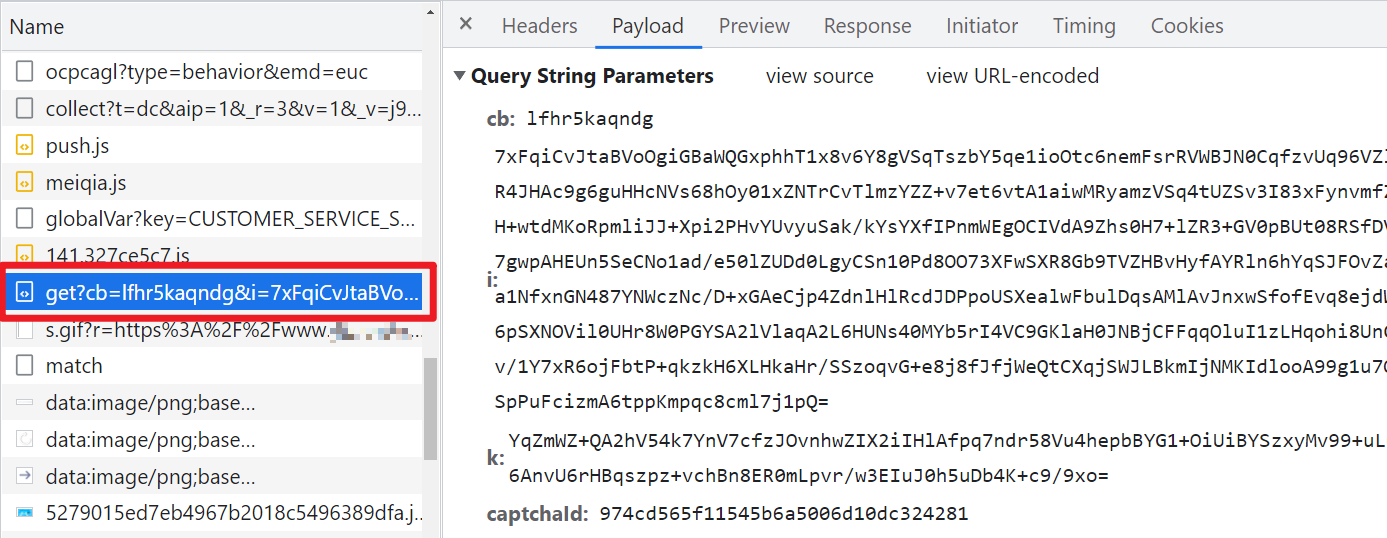
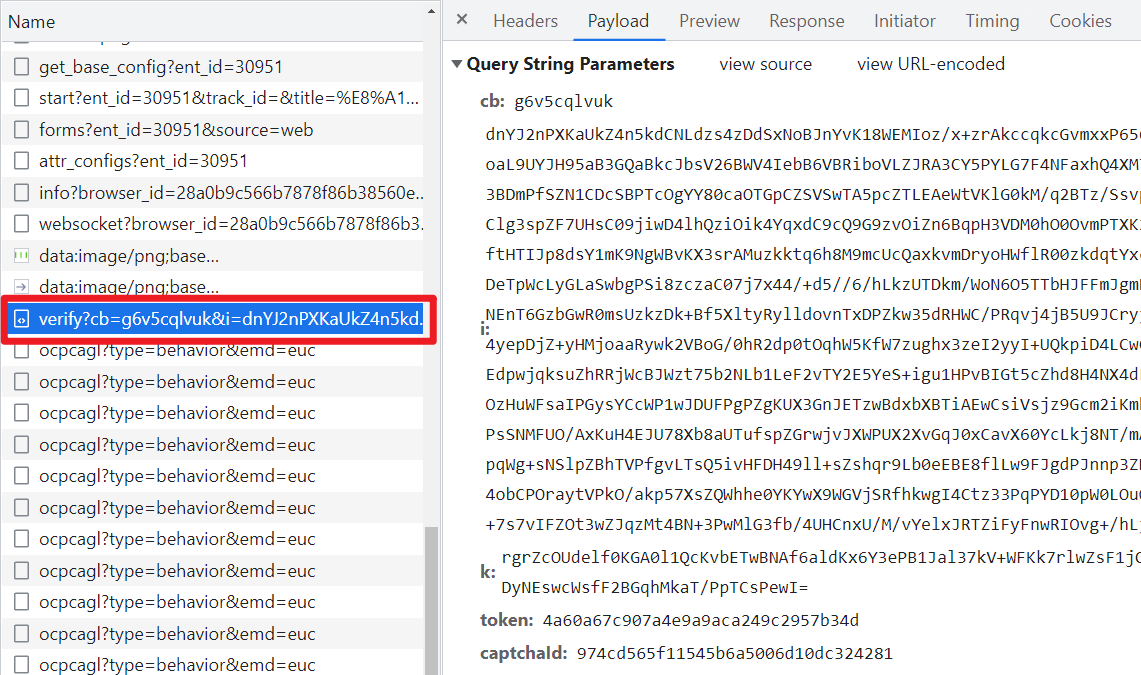
验证接口,包含五个参数:cb、i、k、token、captchaId,其中 token 就是获取验证码接口返回的。

逆向分析
图片接口
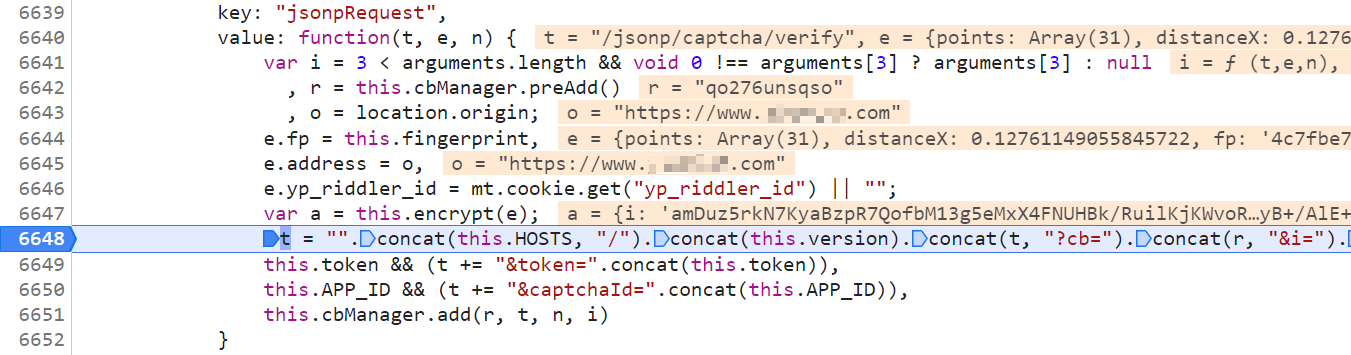
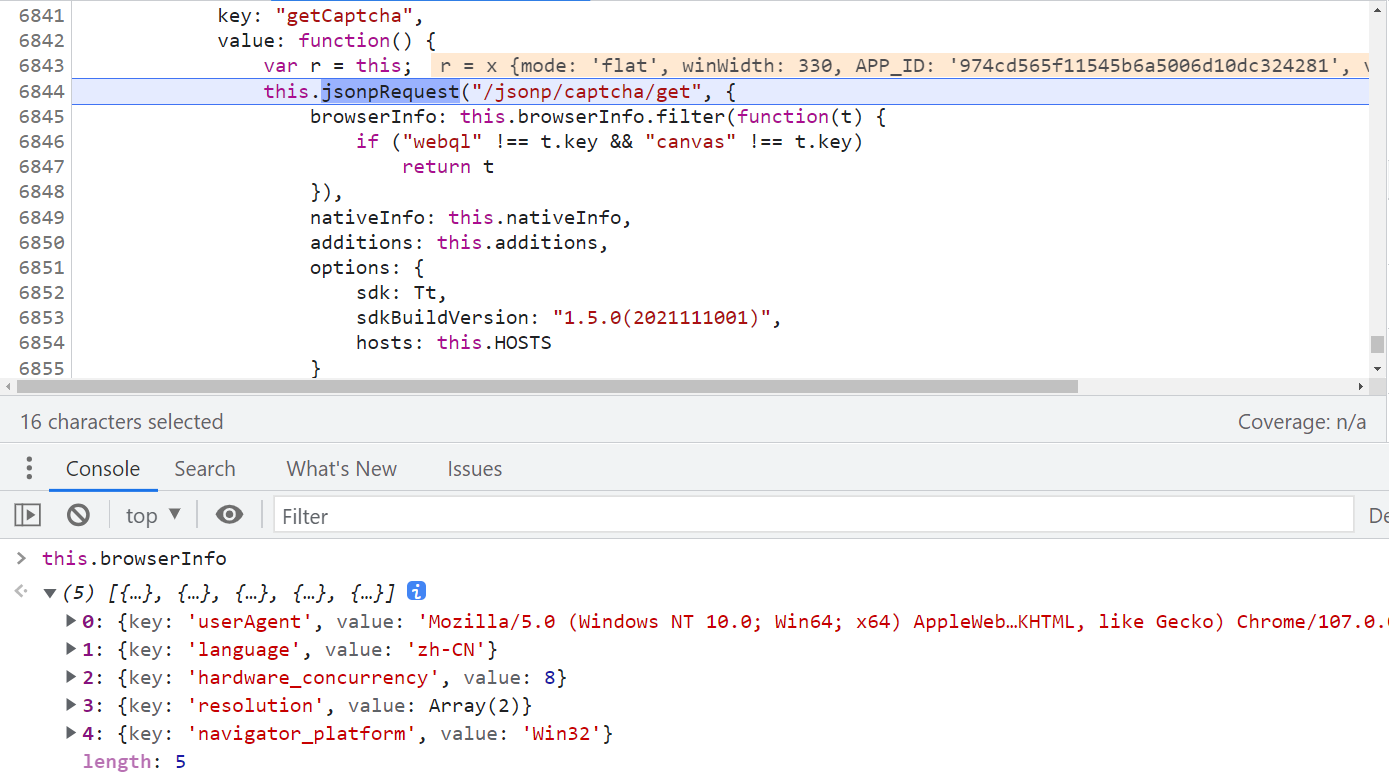
先来看看获取验证码图片的接口,全局搜索关键字 captchaId 即可定位到 key 为 jsonpRequest 的地方,下图中的 t 就是完整的接口 URL 了:
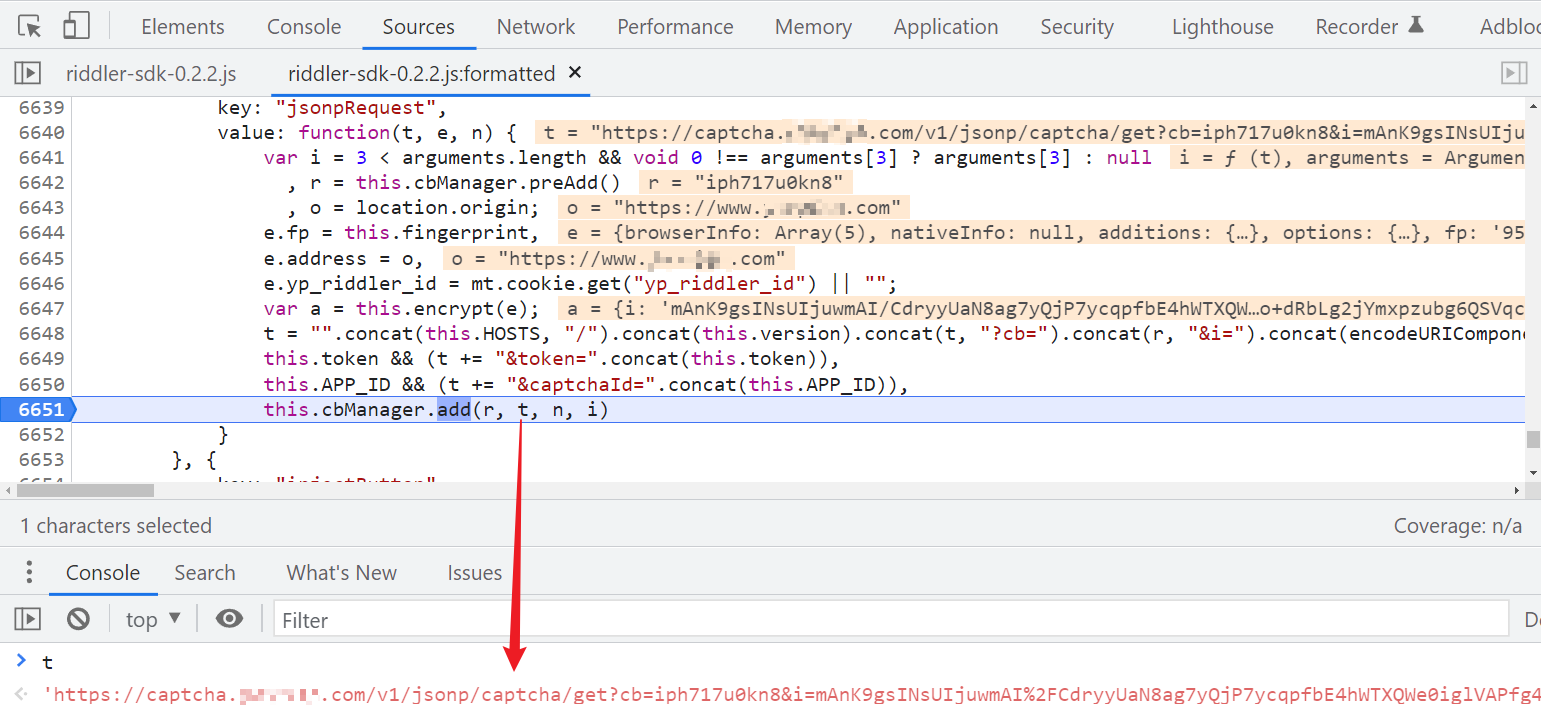
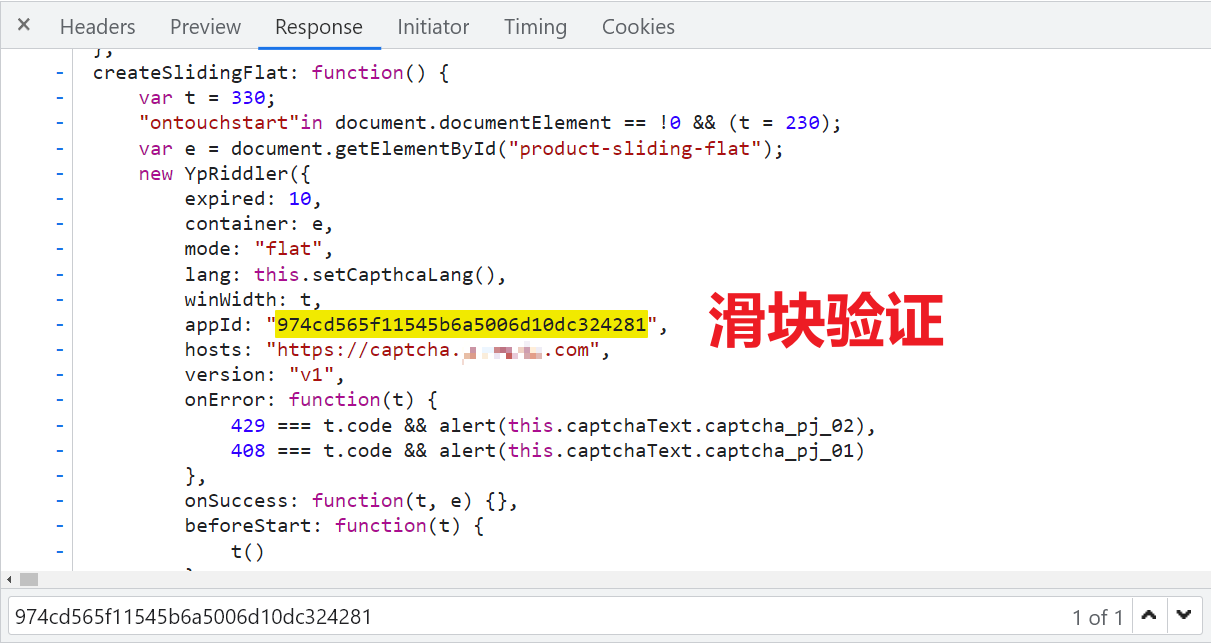
往上挨个找,先看看 captchaId,其实就是 this.APP_ID,多次刷新你会发现,对于滑块来讲,是定值 974cd565f11545b6a5006d10dc324281,对于点选来讲,是定值 e1e7be036f9242c7aed023438af66f46,这两个值在一个 JS 里是写死的,如下图所示:
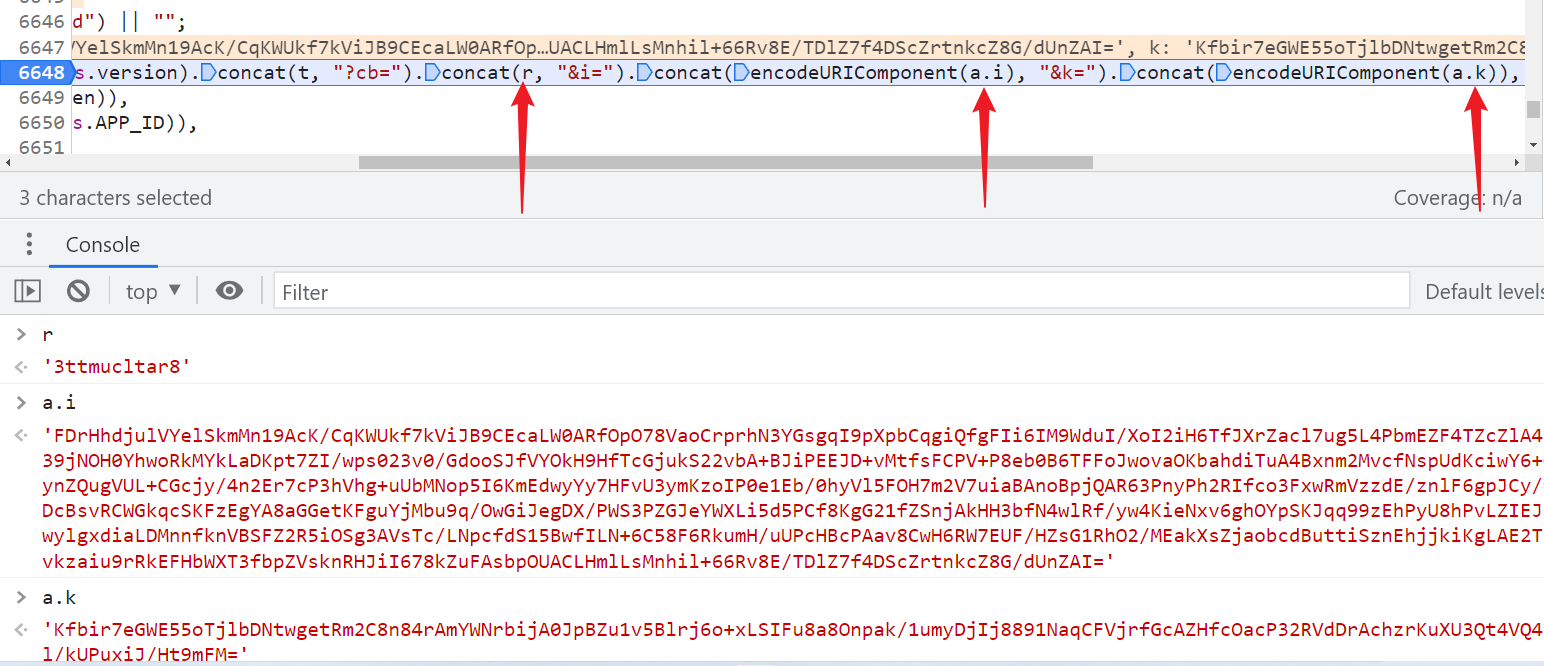
再往上看,HOSTS 啥的是定值就不用说了,cb 就是 r,i 就是 a.i,k 就是 a.k,通过 concat() 方法连接起来,所以只需要搞定 r 和 a 的值就行了,如下图所示:
a 的值是通过 encrypt(e) 得到的,e 里面有 fp、address、yp_riddler_id 等值,如下图所示:
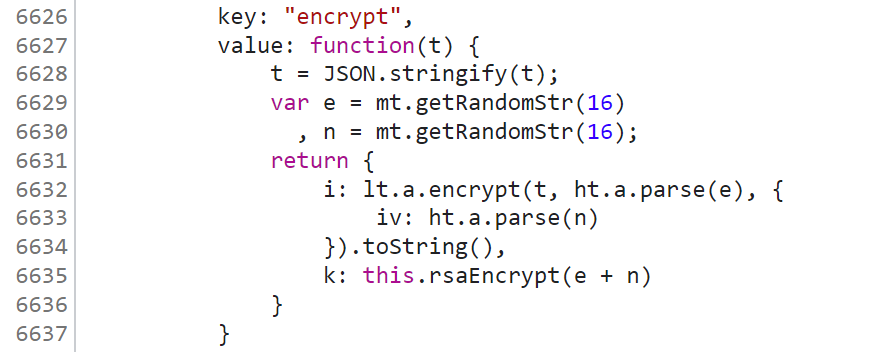
先看看这个 encrypt 方法,最终返回的是 i 和 k,瞧瞧这熟悉的 iv、parse,一看就是 AES、DES 之类的,试一下就知道了,或者跟进 lt.a.encrypt() 看看他的源码,对比一下标准算法里的源码,就可以发现是 AES,k 就很明显了,RSA 加密,公钥啥的一搜就有。
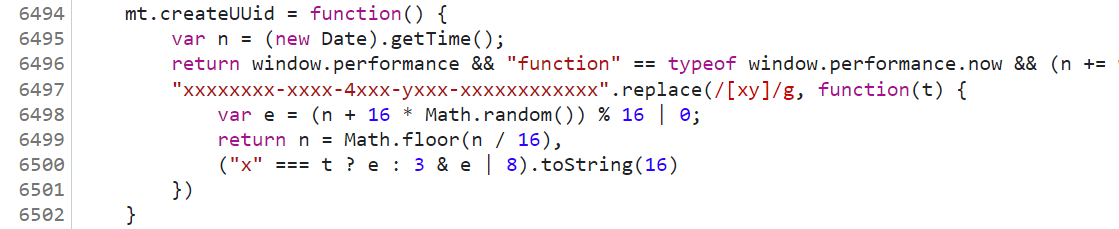
然后往上有个 yp_riddler_id,貌似是从 cookie 中拿的,直接搜索这个关键字,可以找到其设置值的地方,就是一个 UUID,其中有个 window.performance.now() 方法,其作用是返回一个当前页面执行的时间的时间戳,用来精确计算程序执行时间,在 node 实现方法如下:
var perf = require('perf_hooks');
performance = perf.performance.now()
console.log(performance);

然后再往上有个 e.fp = this.fingerprint,这里用到的应该是一个指纹库:https://github.com/fingerprintjs/fingerprintjs ,感兴趣的可以了解一下,同一个浏览器得到的指纹是一样的,这里固定即可。

然后就是 r 的值,preAdd 方法,直接扣就行了


然后这个 e 的值,再传到 jsonpRequest 之前就已经有一些值了,所以我们还得往前跟栈看看:
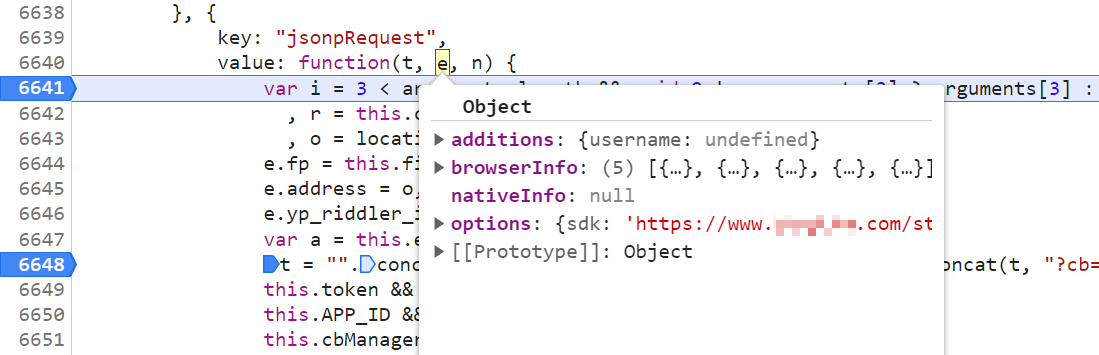
来到 getCaptcha 这里,没啥特别的,扣就完事儿了,其中有个 browserInfo 是浏览器的一些东西,copy 下来就行了。
验证接口
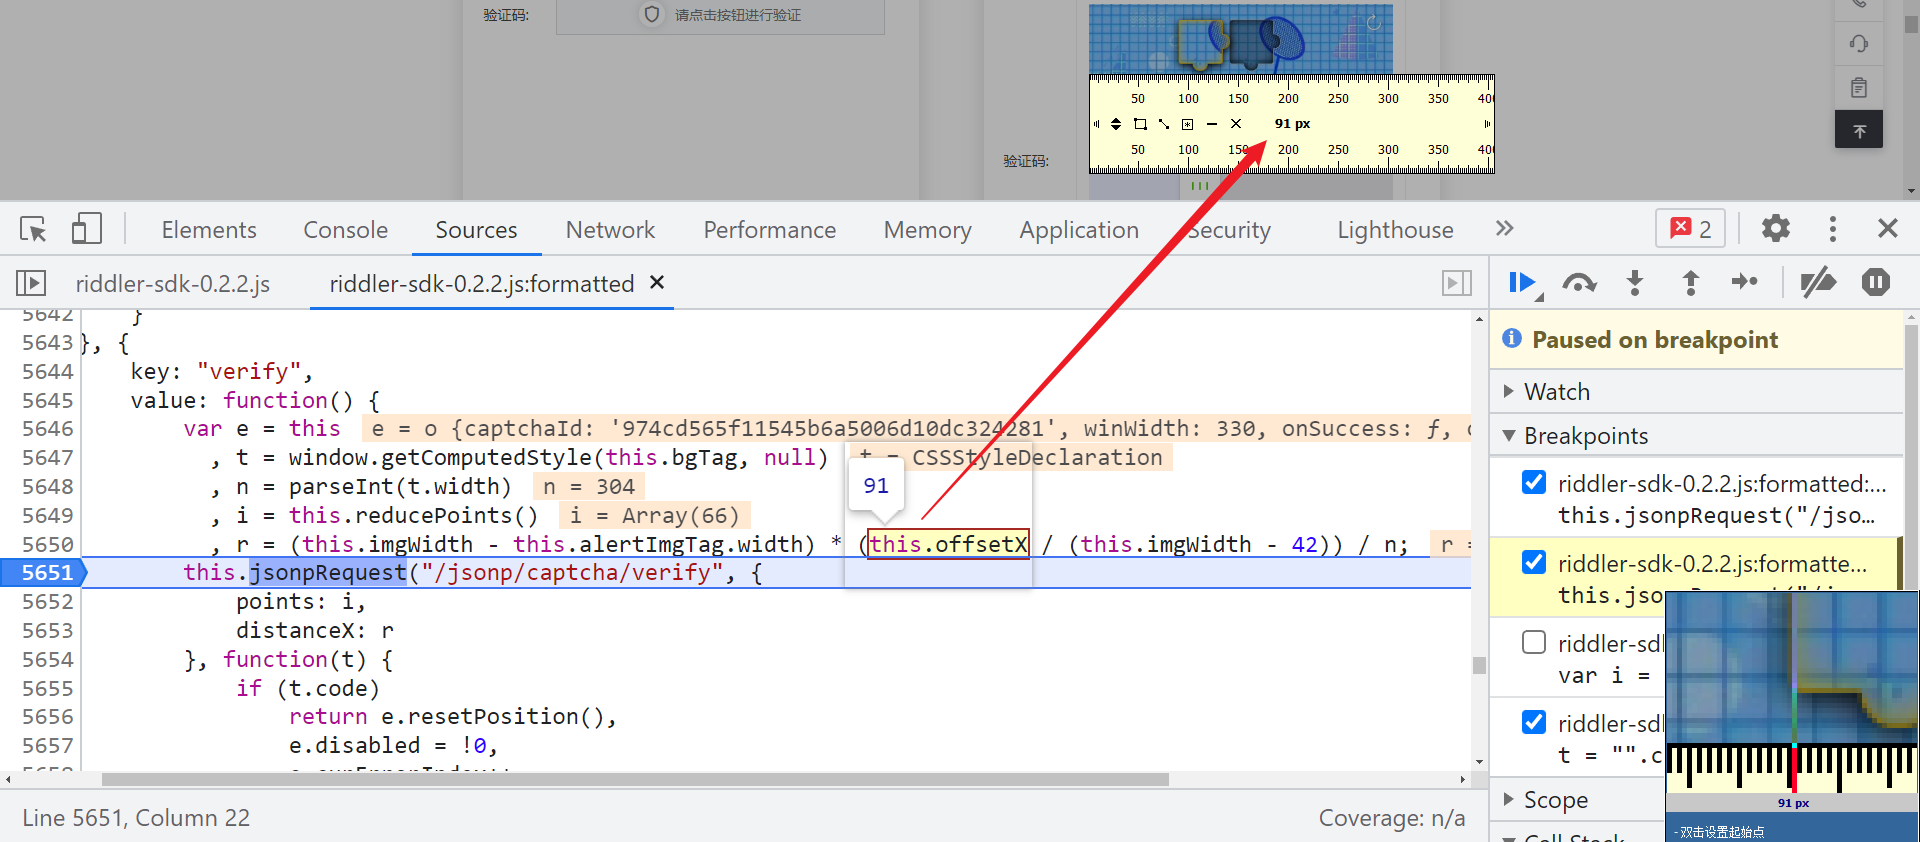
验证接口最后也是走的 jsonpRequest,和前面的获取图片接口类似,不同之处就是传入的 e 里面包含的值不一样,先来看看滑块:
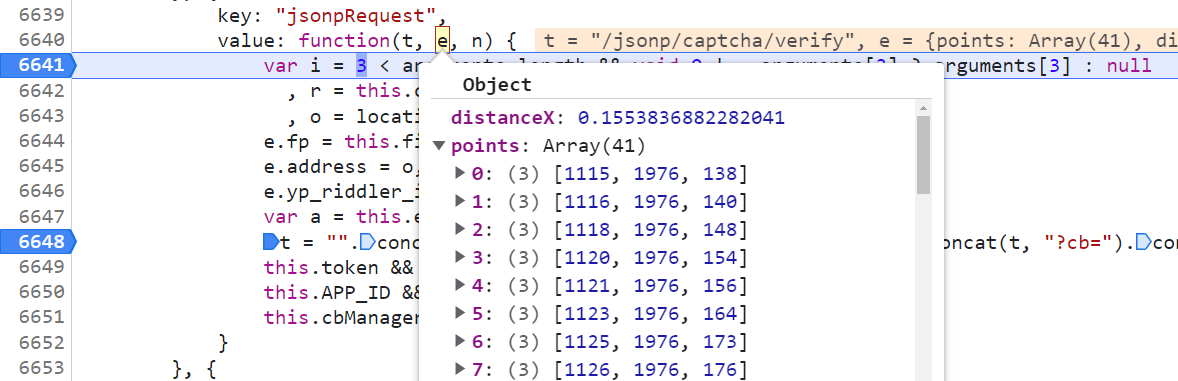
包含 distanceX 和 points,很明显 points 就是轨迹了,再往前跟看看,如下图所示,我们只需要 i 和 r 参数就行了,参数是一些图片高宽,固定就行,offsetX 是滑动的距离。
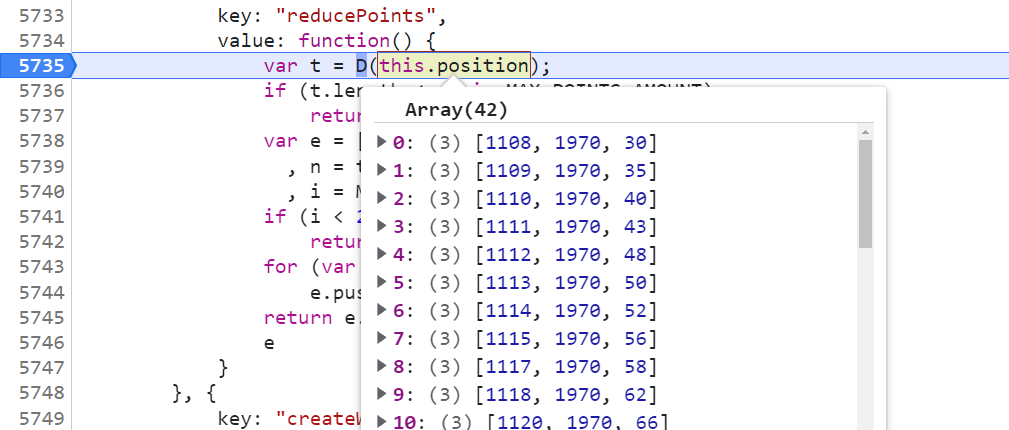
主要看看这个轨迹 i = this.reducePoints(),跟进 reducePoints() 方法里,this.position 是轨迹信息,这个方法对轨迹做了一些处理再返回的,直接把逻辑扣下来即可。
滑块就到这儿了,再来看看点选验证,同样的还是 jsonpRequest,传入的 e 包含了三个点的坐标。
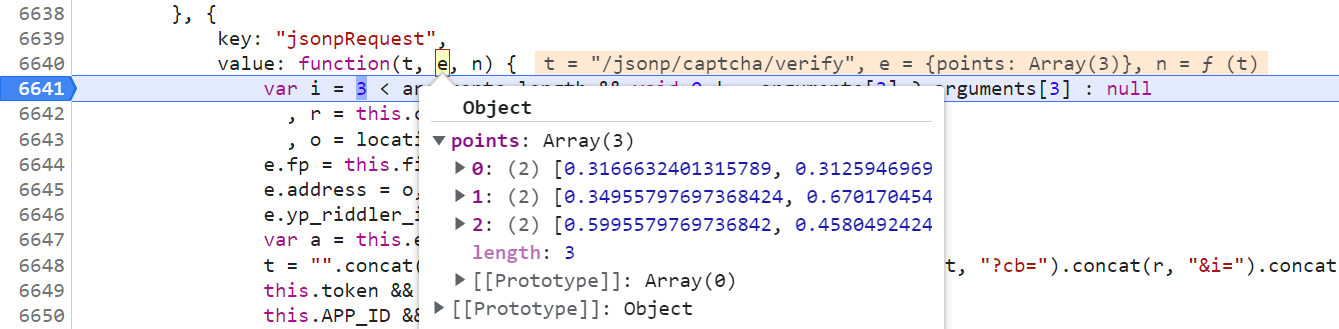
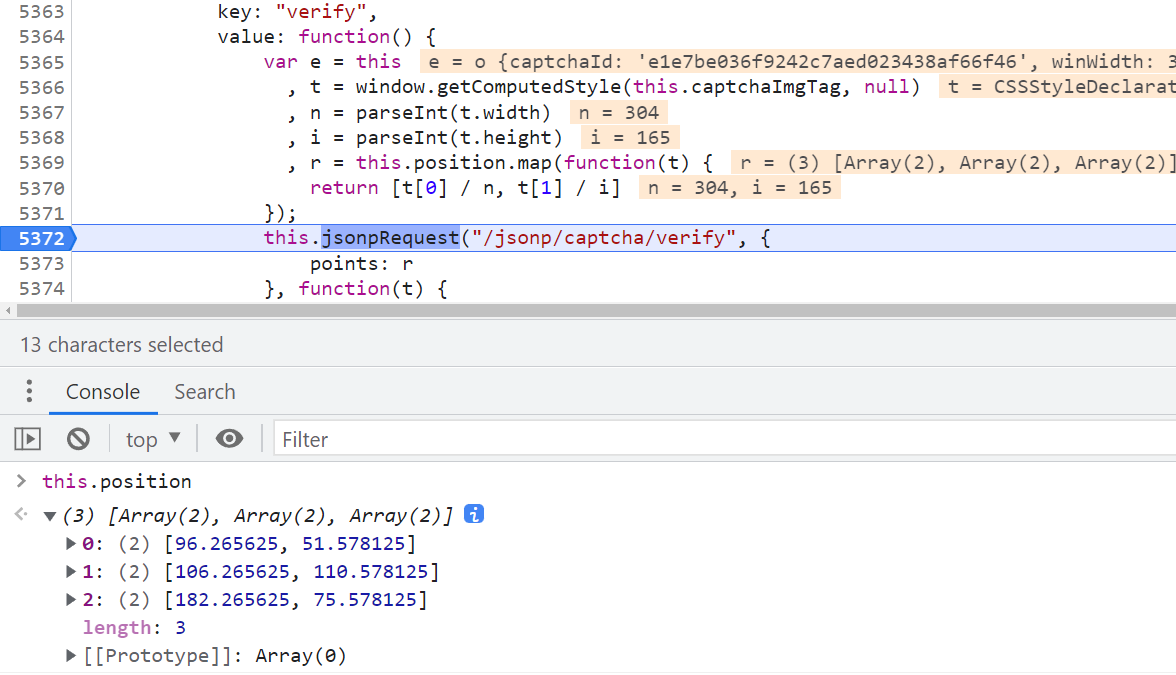
同样往上跟栈,这里的 this.position 才是真实坐标,后面每个坐标分别对 x 和 y 与图片的宽和高进行相除,如下图所示:
结果验证