https://www.cnblogs.com/zichliang/p/15796638.html
各位有兴趣的可以去看看。
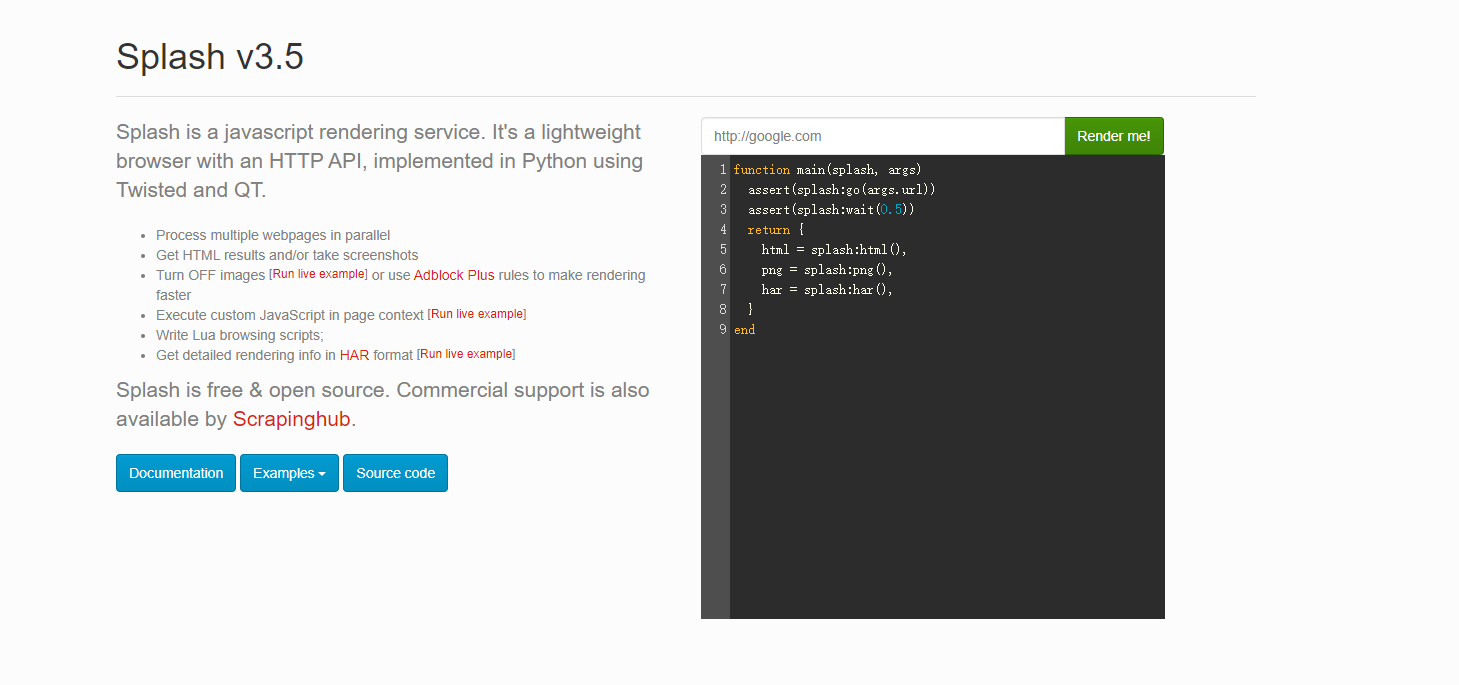
Splash是一个JavaScript渲染服务,是一个带有HTTP API的轻量级浏览器,同时它对接了Python中的Twisted和QT库。
利用它,我们同样可以实现动态渲染页面的抓取。
官方API: https://splash.readthedocs.io/en/stable/api.html
安装
ubuntu 安装docker 命令
curl -sSL https://get.daocloud.io/docker | sh
或者
curl -fsSL https://get.docker.com | bash -s docker --mirror Aliyun
启动docker
sudo docker systemctl start docker
安装Splash 拉取docker镜像
sudo docker pull scrapinghub/splash
拉取成功后启动服务器
启动命令为:
docker run -p 8050:8050 -p 5023:5023 scrapinghub/splash

最后再浏览器中打开

功能介绍
[ol]
异步方式处理多个网页渲染过程
获取渲染后页面的源代码或截图
通过关闭图片渲染或者使用Adblock规则来加快页面渲染速度
可执行特定的JavaScript脚本
可通过Lua脚本来控制页面渲染过程
获取渲染的详细过程并通过HAR(HTTP Archive)格式呈现
[/ol]
——————————————————————————————————————————————————————————————————————————————
功能实例
go 用来请求某个链接
可以模拟get和post请求,同时传入请求头、表单等数据,赋值传入变量时用{}
go方法有2个返回值,ok和reason,
ok为空代表网页加载出现错误,
reason变量中包含错误原因
[ol]
[/ol]
function main(splash, args)
local ok, reason = splash:go{
url="http://httpbin.org/post",
http_method="POST",
body="name=dmr"
}
splash:wait(2)
if ok then
return splash:html()
end
end
异步处理 机制
异步处理
ipairs,为集合元素进行编号(编号从1开始),类似于python的enumerate
lua脚本语言中字符串拼接用 ..
splash:wait()类似于python中的time.sleep()
当Splash执行wait方法时,它会转而去处理其他任务,等到指定时间结束后再回来进行继续处理
function main(splash, args)
local example_urls = {"www.baidu.com", "www.taobao.com", "www.zhihu.com"}
local urls = args.urls or example_urls
local results = {}
for index, url in ipairs(urls) do
local ok, reason = splash:go("http://" .. url)
if ok then
splash:wait(2)
results[url] = splash:png()
end
end
return results
end
JavaScript等的操作方法
jsfunc方法
可以直接调用JavaScript定义的方法,所调用的方法要用双括号包围
如下示例,通过构造JavaScript方法来获取访问页面的title和div数量并返回
function main(splash, args)
local get_div_count = splash:jsfunc([[
function(){
var title = document.title;
var body = document.body;
var divs = body.getElementsByTagName('div');
var div_count = divs.length;
return {div_count, title};
}
]])
ok, reason = splash:go("https://www.mi.com")
result = get_div_count()
return ("This page'title is %s, there are %s divs"):format(result.title, result.div_count)
end
evaljs方法
可以执行JavaScript代码并返回最后一条JavaScript的返回结果
如下示例,只返回最后一条JavaScript语句的执行结果
function main(splash, args)
splash:go("https://www.mi.com")
result = splash:evaljs("document.title;document.body.getElementsByTagName('div').length;")
return result
end
runjs方法
可以执行JavaScript代码,与evaljs类似,但是更偏向于执行某些动作或声明某些方法
如下示例,用runjs方法构造了一个JavaScript定义的方法,然后用evaljs执行此方法获取返回结果
function main(splash, args)
splash:go("https://www.mi.com")
splash:runjs("fofo = function(){return 'dmr'}")
result = splash:evaljs('fofo()')
return result
end
autoload方法
可以设置每个页面访问时自动加载的对象,在Lua语言中nil相当于python的None
ok, reason = splash:autoload{source_or_url, source=nil, url=nil}
[ol]
[/ol]
示例1,通过构造一个get_path_title对象方法,用evaljs调用执行获取返回结果,在这里与runjs类似,不过构造方法需要用[]中括号
function main(splash, args)
splash:autoload([[
function get_path_title(){
return document.title;
}
]])
splash:go("https://www.mi.com")
result = splash:evaljs('get_path_title()')
return result
end
发起get 和post请求
http_get方法,模拟发送http的get请求
response = splash:http_get{url, headers=nil, follow_redirects=true}
[ol]
[/ol]
function main(splash, args)
local t = require("treat")
local response = splash:http_get("https://www.taobao.com")
if response.status == 200 then
return {
b_html = response.body,
html = t.as_string(response.body),
url = response.url,
status = response.status,
}
end
end
http_post方法,模拟发送http的post请求,与http_get方法类似,不过多个body表单参数
http_post方法,模拟发送http的post请求,与http_get方法类似,不过多个body表单参数
response = splash:http_get{url, headers=nil, follow_redirects=true, body=nil}
[ol]
[/ol]
如下示例,将表单数据提交到了json中
function main(splash, args)
local t = require("treat")
local json = require("json")
local response = splash:http_post{
args.url,
body=json.encode({name="dmr"}),
headers={["content-type"]="application/json"}
}
if response.status == 200 then
return {
'response',
b_html = response.body,
html = t.as_string(response.body),
url = response.url,
status = response.status,
}
end
end
Cookies的获取添加与删除
获取
function main(splash, args)
assert(splash:go("https://www.baidu.com"))
return {cookies = splash:get_cookies()}
end
添加
add_cookie方法,为当前页面添加cookie
splash:add_cookie{name, value, path=nil, domain=nil, expires=nil, httpOnly=nil,secure=nil,}
function main(splash, args)
splash:add_cookie{'name', 'dmr'}
assert(splash:go("https://www.baidu.com"))
return {cookies = splash:get_cookies()}
end
删除
clear_cookies方法,清楚所有的cookies
function main(splash, args)
splash:add_cookie{'name', 'dmr'}
assert(splash:go("https://www.baidu.com"))
splash:clear_cookies()
return {cookies = splash:get_cookies()}
end
select方法 和 select_all方法
select方法
查找符合条件的第一个节点,用的是CSS选择器
function main(splash, args)
assert(splash:go("https://www.taobao.com"))
input = splash:select("#q")
input:send_text("数码")
splash:wait(2)
return splash:jpeg()
end
select_all方法
查找符合条件的所有节点,用的是CSS选择器
function main(splash, args)
local treat = require("treat")
assert(splash:go("https://movie.douban.com/top250"))
assert(splash:wait(1))
local items = splash:select_all(".inq")
local sum = {}
for index, item in ipairs(items) do
sum[index] = item.node.innerHTML
end
return {
obj1 = sum,
obj2 = treat.as_array(sum)
}
end
设置定时任务进行延时执行
call_later方法,设置定时任务进行延时执行,并且可以在执行前通过cancel()方法重新执行定时任务
如下示例,构造一个timer定时任务,
当访问页面时,等待0.2秒获取页面的截图,
再等待1秒后获取页面的截图
第一次获取页面的截图页面还没加载出来,
所以获取到的是空白页
function main(splash, args)
local pngs = {}
local timer = splash:call_later(function()
pngs['a'] = splash:png()
splash:wait(1)
pngs['b'] = splash:png()
end, 0.2)
splash:go("https://www.mi.com")
return pngs
end
其他一些功能与方法
splash:html()
splash:wait(2)
splash:set_user_agent('Splash')
splash:set_custom_headers({
["User-Agent"] = "Splash",
["Host"] = "Splash.org"}
)
splash:get_viewport_size()
splash:set_viewport_size(400, 400)
splash:set_viewport_full()
splash:url()
splash:har()
params={
png = splash:png(),
jpeg = splash:jpeg()
}
splash:set_content("hello")
splash.scroll_position = {y = 800}
splash.plugins_enabled= true
splash.images_enabled = false
splash.resource_timeout = 0.01
splash.js_enabled = False
search = splash:select('#su')
search:mouse_click()
splash:select("#username"):send_text("username")
一些万用脚本
添加请求头 请求url
function main(splash,args)
local url=args.url
splash:set_user_agent("Mozilla/5.0Chrome/69.0.3497.100Safari/537.36")
splash:go(url)
splash:wait(2)
splash:go(url)
return{
html=splash:html(),
png = splash:png()
}
end
通过滑动 来完成动态加载
function main(splash, args)
splash:go(args.url)
local scroll_to = splash:jsfunc("window.scrollTo")
scroll_to(0, 2800)
splash:set_viewport_full()
splash:wait(5)
return {html=splash:html()}
end
对接python
render.html
render.html页面,此接口用于获取JavaScript渲染的页面的HTML代码
获取百度页面源代码url示例:http://localhost:8050/render.html?url=https://www.baidu.com
示例,通过调用render.html页面获取百度的源代码并且设置等待时间为4秒import requests
url = ' http://192.168.2.55:8050/render.html?url=https://www.baidu.com&wait=4'
response = requests.get(url)
print(response.text)
render.png和render.jpeg
render.png和render.jpeg,此接口获取网页截图,返回的是二进制数据
配置参数:url,wait,width,height
render.jpeg多了个参数quality,
用来调整图片的质量,取值1-100,默认值为75,应尽量避免取95以上的数值
url示例:http://localhost:8050/render.png?url=https://www.baidu.com&wait=2&width=400&height=400
示例,通过render.png接口获取页面宽400高400的页面截图并保存到文件中
url = 'http://192.168.2.55:8050/render.png?url=https://www.taobao.com&wait=5&width=1000&height=700'
url2 = 'http://192.168.2.55:8050/render.jpeg?url=https://www.taobao.com&wait=5&width=1000&height=700&quality=90'
response = requests.get(url)
with open('taobao.png', 'wb') as f:
f.write(response.content)
response2 = requests.get(url2)
with open('taobao.jpeg', 'wb') as f:
f.write(response2.content)
render.har
此接口用来获取页面加载的HAR数据,返回的是json格式的数据
url示例:http://localhost:8050/render.har?url=https://www.baidu.com&wait=2import requests, json
url = ' http://192.168.2.55:8050/render.har?url=https://www.baidu.com&wait=2'
response = requests.get(url)
print(response.content)
with open('har.text', 'w') as f:
f.write(json.dumps(json.loads(response.content), indent=2))
render.json
render.json,此接口包含了前面接口的所有功能,返回结果是json格式
url示例:http://localhost:8050/render.json?url=https://www.baidu.com&html=1&png=1&jpeg=1&har=1
默认返回:
{'url': ' https://www.baidu.com/', 'requestedUrl': ' https://www.baidu.com/', 'geometry': [0, 0, 1024, 768], 'title': '百度一下,你就知道'}
通过将html、png、jpeg、har参数置为1获取相关的页面数据import requests, json
url = ' http://192.168.2.55:8050/render.json?url=https://www.baidu.com&html=1&png=1&jpeg=1&har=1'
response = requests.get(url)
data = json.loads(response.content)
print(data)
print(data.get('html'))
print(data.get('png'))
print(data.get('jpeg'))
print(data.get('har'))
**execute
功能强大,此接口可实现与Lua脚本的对接,实现交互性操作
url示例:http://localhost:8050/execute?lua_source=
示例1,简单示例,返回lua的执行结果
from urllib.parse import quote
import requests
lua = '''
function main(splash)
return 'hello'
end
'''
url = 'http://192.168.2.55:8050/execute?lua_source=%s' % quote(lua)
response = requests.get(url)
print(response.text)
示例2,通过execute执行lua脚本获取页面的url,png,html
from urllib.parse import quote
import requests, json
lua = '''
function main(splash)
splash:go('https://www.baidu.com')
splash:wait(2)
return {
html = splash:html(),
png = splash:png(),
url = splash:url()
}
end
'''
url = 'http://192.168.2.55:8050/execute?lua_source=%s' % quote(lua)
response = requests.get(url)
print(type(response.text), response.text)
dic = json.loads(response.text)
print(type(dic), len(dic), dic.keys())
对接scrapy
def start_requests(self):
lua="""
function main(splash, args)
splash.images_enabled = false
assert(splash:go(args.url))
assert(splash:wait(1))
js = string.format("document.querySelector('body > div.container > div.main.clearfix > div > div.page > span:nth-child(4) > a').click();", args.page)
splash:runjs(js)
assert(splash:wait(5))
return splash:html()
end
"""
url="http://www.pingtan.gov.cn/jhtml/cn/8423"
yield scrapy_splash.SplashRequest(
url=url,
endpoint="execute",
args={
"url":url,
"lua_source":lua,
"page":page,
"wait":1
},
callback=self.parse
)
Splash使用代{过}{滤}理
直接设置
yield SplashRequest(
url=self.start_urls[0],
callback=self.parse,
args={
"wait": 3,
# 这里写你代{过}{滤}理
"proxy": 'http://xxx.xxx.xxx.xxx:xxx'
}
)
使用中间件设置
class ProxyMiddleware(object):
def process_request(self, request, spider):
# proxyServer 是代{过}{滤}理
request.meta['splash']['args']['proxy'] = proxyServer
# 认证消息,没有可以不写
# request.headers["Proxy-Authorization"] = proxyAuth
好了就介绍到这里把 也是自己整理了好多大神的资料


